Software Acquisition
After spending some time understanding where things are on your machine, one of the first things you will need to do is begin to acquire the tools that you need to achieve your goals.
Note
Software, binary, package, and application are all terms used interchangeably. Various organizations may use these terms differently, but they are all the same for the purpose of this course.
Package Managers
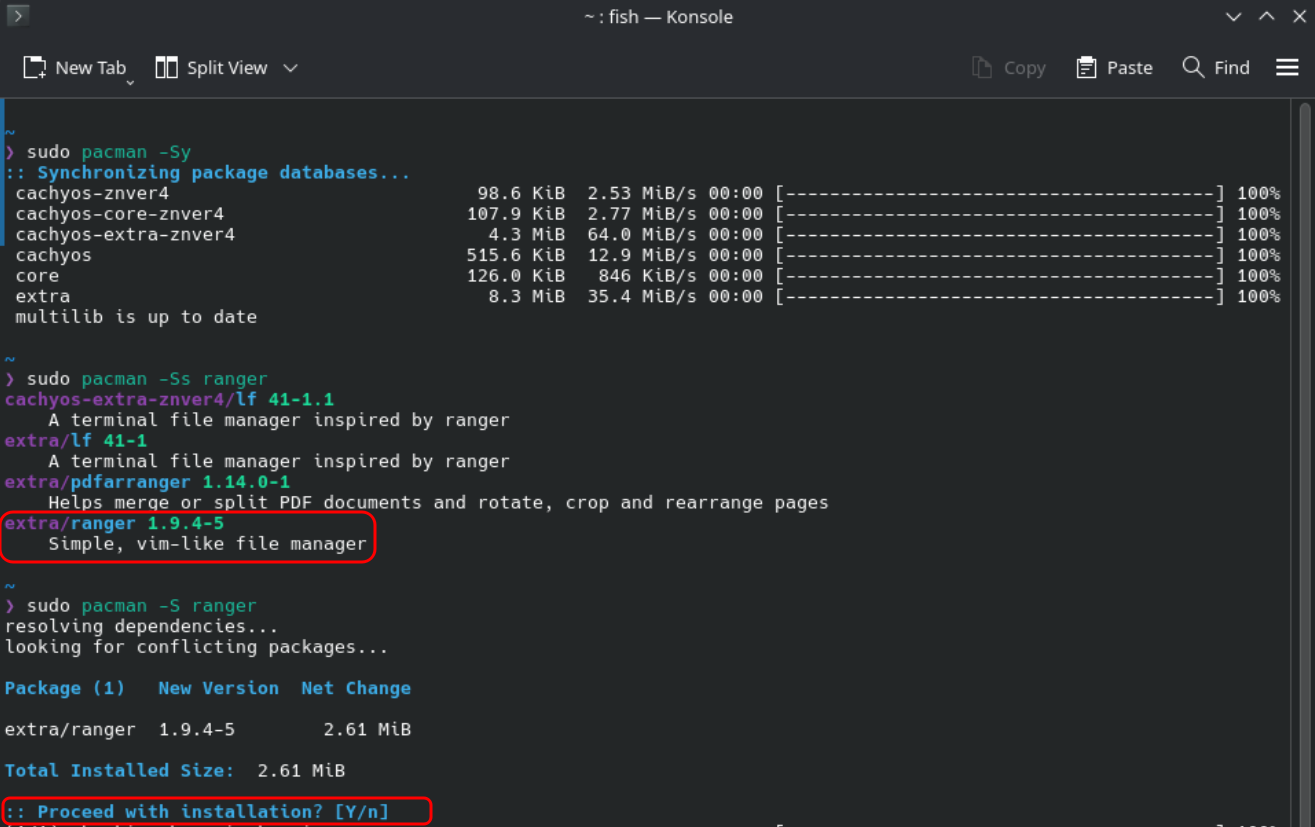
Whether via the terminal, or wrapped in a nice GUI, your distribution will come with some sort of package manager. A package is just another name for software, which is put together or “packaged” for your system (architecture, OS, etc). We will begin by learning our package manager via the terminal, because this is more powerful, but again, you may prefer to use a GUI day-to-day.
CLI (Command Line Interface) Tools
This is the first time that we will split instructions based on the system you are using, so select the tab below for your system. You can come back here if you want to try the other documented option later.
Note
Remember, Debian-based systems include Debian, Linux Mint, Zorin, Ubuntu, and many others. Arch-based systems include Arch, CachyOS, Garuda, Manjaro, Artix and others. If you’re not sure about your distro, ask.
Debian-based systems use apt, the Advanced Package Tool. Go ahead and open a terminal and enter the following commands:
-
sudo apt update- Here we see
sudofor the first time. This is short for “superuser do,” and allows you to run commands with elevated privileges. This requires your user password for each session (and may timeout).aptis our program, andupdateis the option. In this case we are checking pre-defined software repositories for updates to packages already on our system. A repository is simply a place where code is publicly or privately stored for retrieval.
- Here we see
-
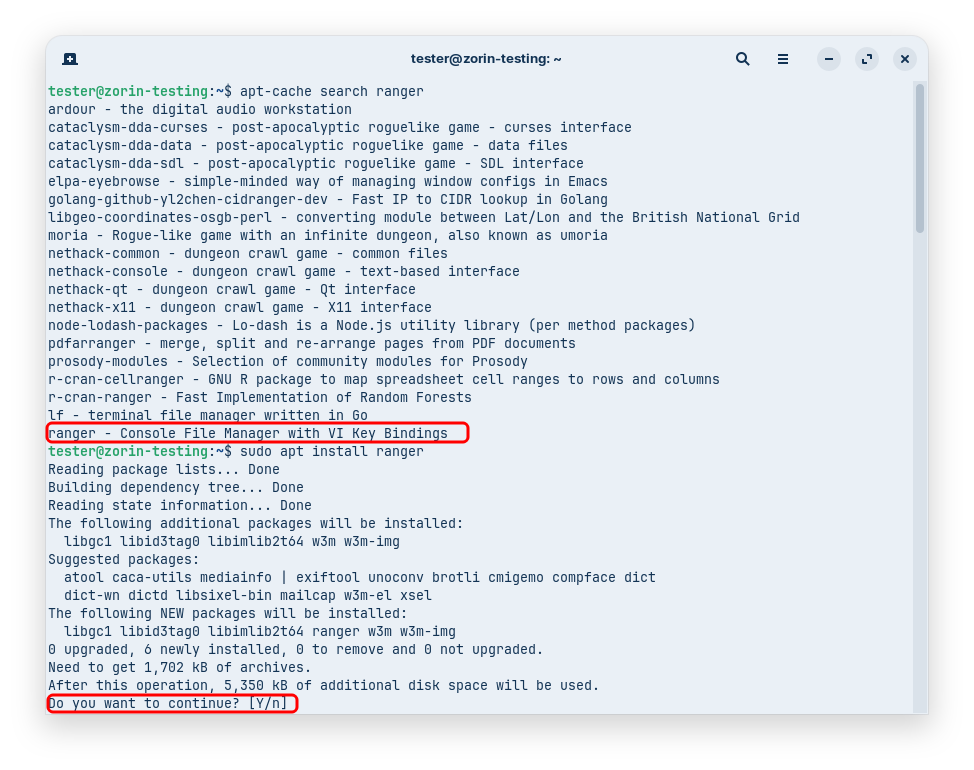
apt-cache search ranger- The
apt-cachecommand can be used to query available packages. Obviously, thesearchoption let’s us look for a package based on a keyword. We’re looking for therangersoftware. This search will yield several options. - Notice that
sudois not required since the operation does not affect your system.
- The
-
sudo apt install ranger- Next we’ll use the
installoption to actually get a package. - You will be asked to confirm the install, press
yon your keyboard to do so (the default option, in this caseYis capitalized, so you can also just hitreturn). - The
rangersoftware is a CLI (Command Line Interface) file explorer. We won’t require or dive on this tool, but you may find it useful.
Tip
Use GUI and/or CLI tools however you prefer. That said, in a terminal you can become extremely fast since the keyboard has so many possible actions, and your hands never have to move to the mouse. Proficiency has major benefits, especially if you want to pursue security, programming, or systems administration.
- Next we’ll use the
-
ranger- Let’s check out our new tool by starting it. You can navigate with the arrow keys or Vim bindings - a concept we’ll cover later. Use
qto quit. If for any reason that doesn’t work, it’s okay to close the terminal window and open a new one.
- Let’s check out our new tool by starting it. You can navigate with the arrow keys or Vim bindings - a concept we’ll cover later. Use
-
Optional
sudo apt remove ranger- If you don’t want this tool for now, you can uninstall it with this
aptcommand.
- If you don’t want this tool for now, you can uninstall it with this
-
clear- You may like to clean up when you move to a new task with the
clearcommand.
- You may like to clean up when you move to a new task with the
-
sudo apt upgrade- Lastly let’s update everything on our system. Again we call the
aptcommand, this time with the instruction to upgrade any packages with new versions available. If you continue with this command, a reboot may be suggested to you (usually for Linux kernel updates). If you don’t reboot now, be sure to do it soon.
- Lastly let’s update everything on our system. Again we call the
GUI (Graphical User Interface) Tools
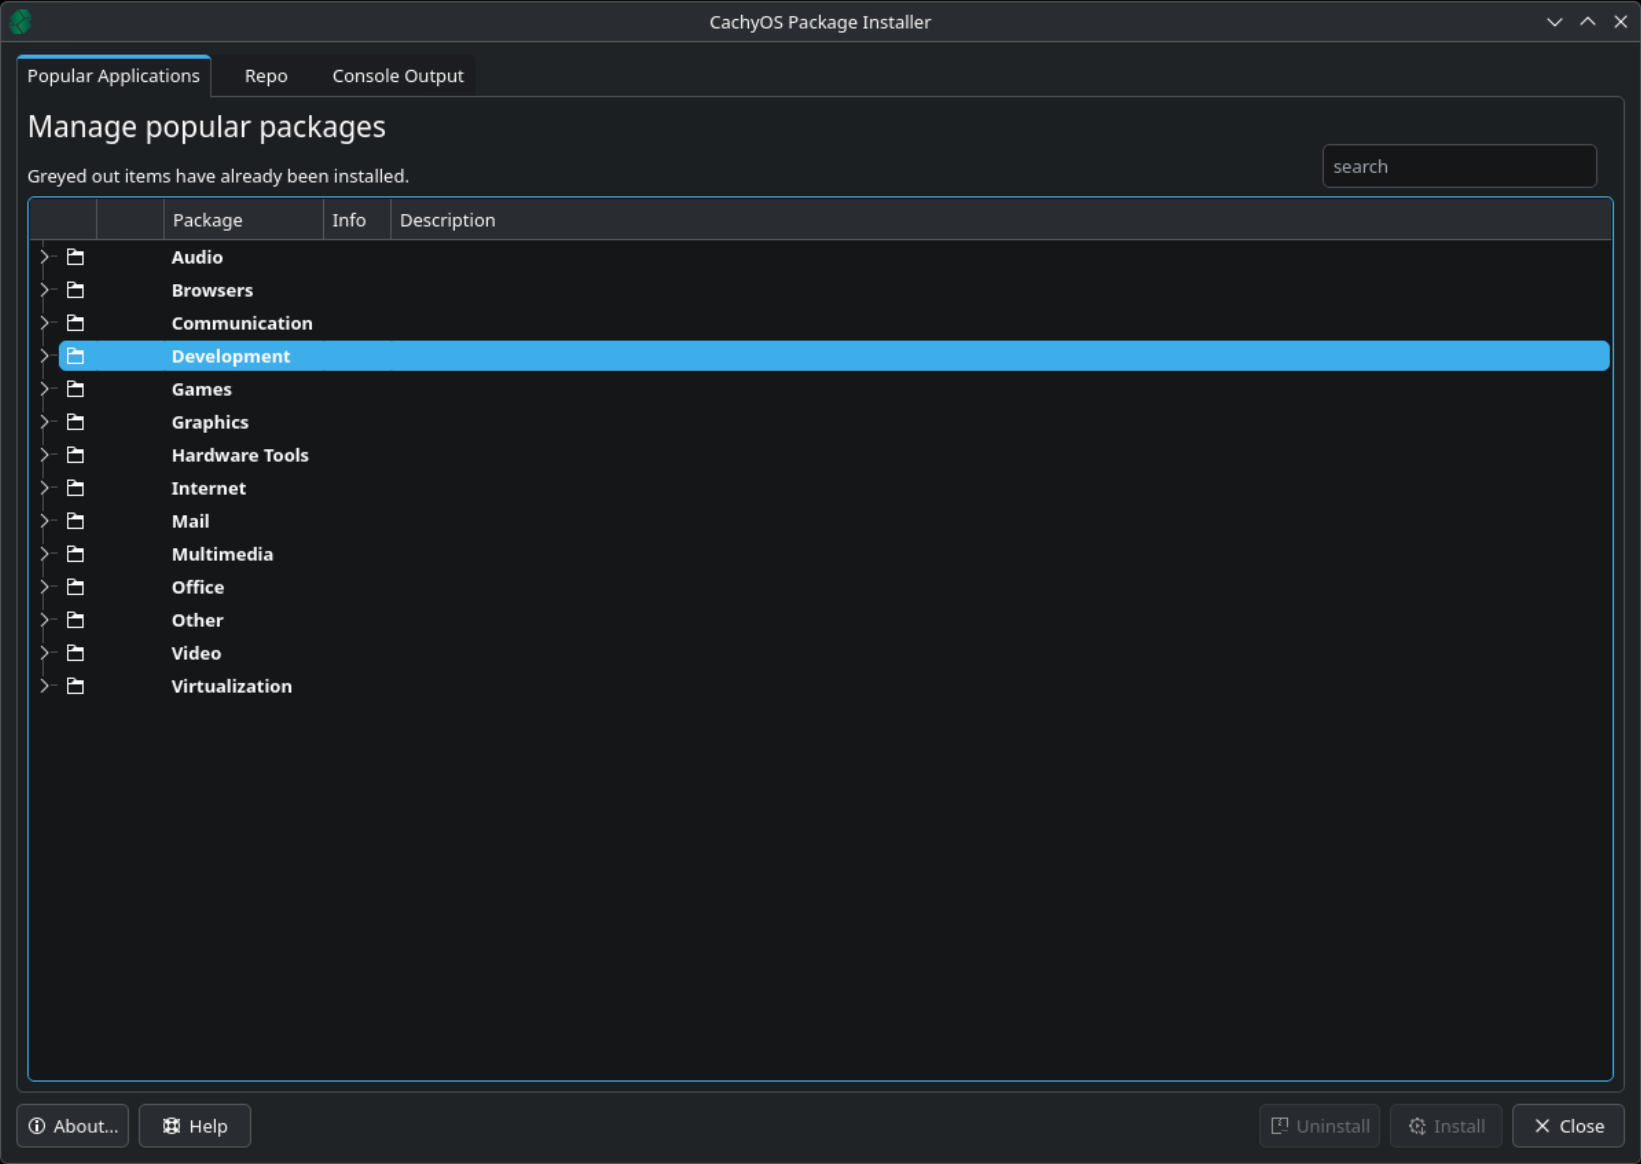
GUIs will vary more significantly, even within a given distribution family. We will only briefly introduce a couple of these. Remember that these will usually just be a graphical interface on top of the above introduced software (in the case of Debian/Arch), and they are largely intuitive.
Let’s quickly look at the ZorinOS/GNOME graphical software center, simply called “Software.”
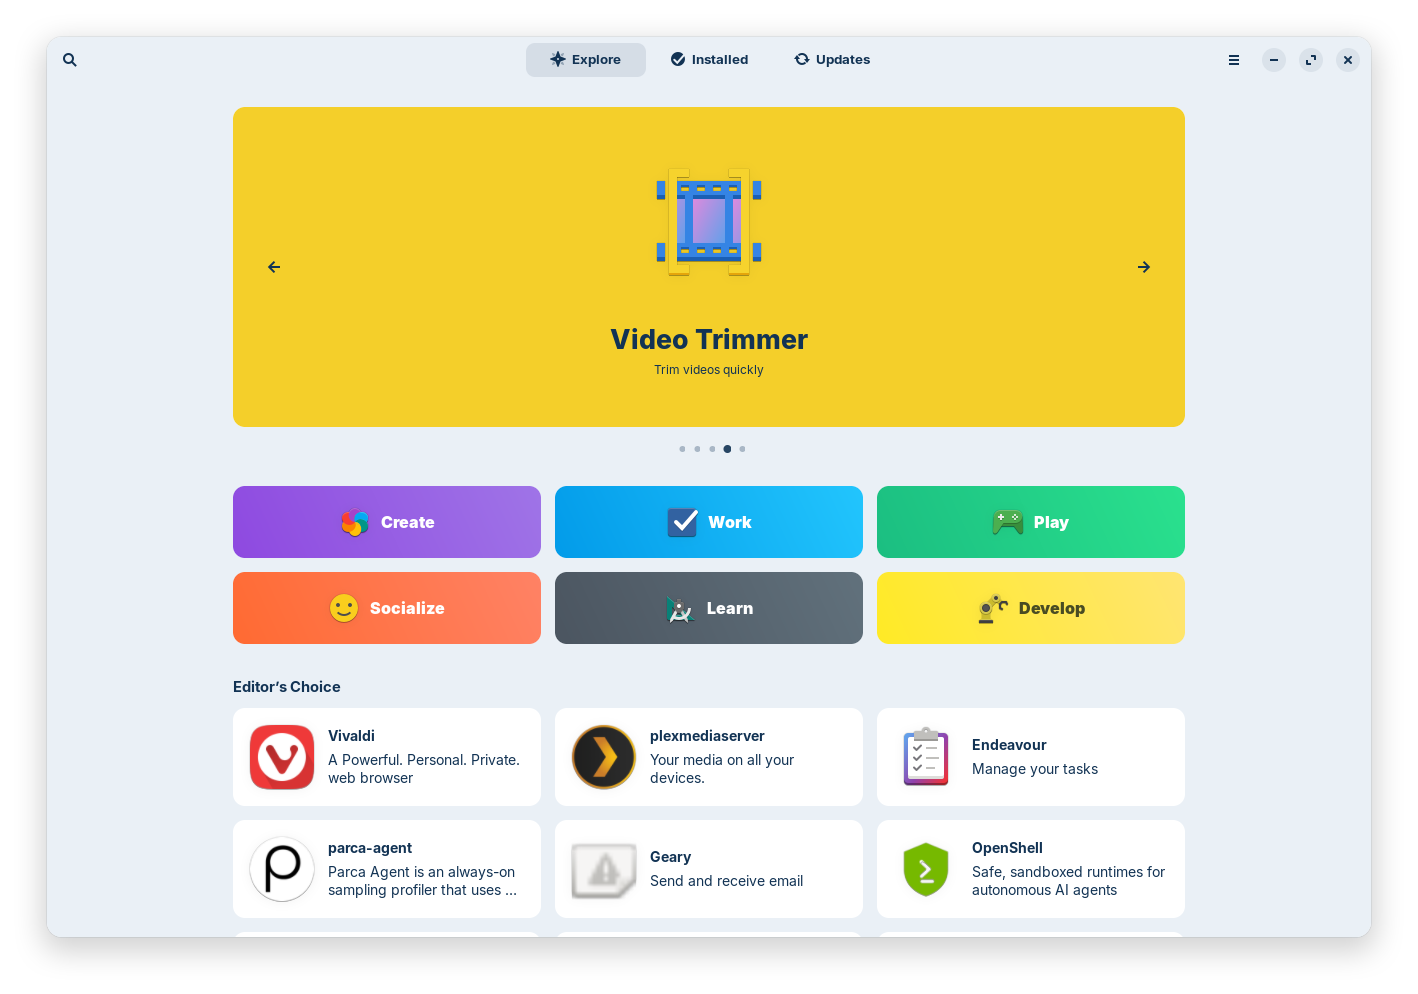
- At the very top left is the search icon which you can use to search for new software.
- The default ‘Explore’ tab let’s you browse software from the pre-selected repositories.
- The ‘Installed’ tab shows software already installed on your system.
- The ‘Updates’ tab shows any available updates for your installed packages.
- Lastly the top-right menu (three horizontal lines are known as a ‘hamburger menu’) contains your Repositories, Preferences, and more.
We’ll talk further on code repositories in future.
Snaps, Flatpaks, and AppImages
There are some relatively new styles of packaging software that attempt to make software more portable across Linux distributions. Snaps and Flatpaks add some additional security via sandboxing, but require you to use the snap and flatpak software to run them. AppImages are simple files that can be run directly, which are lightweight, but carry no additional security. More discussions on these ecosystems will come in the future, especially as they mature and developers decide how they prefer to distribute their software.
Building/Compiling from Source
This is ultimately where all our software comes from. The code written by a developer must be built or ‘compiled’ from the language it was written in, into a machine-readable (and yes, ‘human-unreadable’) format that your system can run, known as a ‘binary.’ It’s called a binary because it’s zeroes and ones. Most of the software acquisition we’ve looked at involved downloading pre-compiled binaries, or in some cases, the package manager may build the binary for you.
For now, we’re just introducing the idea and terms so you are familiar. We’ll save the process of compiling software from source for another course since more foundational concepts must be introduced first.