Heirarchical File System
The Heirarchical File System, or Directory Tree, is how files are organized on most computers, including yours and most servers you visit online. In Linux, everything is treated as a file - files, directories, programs, devices, configurations, everything. Understanding this structure allows you to be deeply familiar with your system, manipulate it, and remain organized with your data.
As the name implies, your file system works as a heirarchy. This is described as a tree because every directory begins at a common root and ‘branches’ out. Although the inverse of a real tree, this structure is traditionally conceptualized as ‘top-down.’ So when a file is in a directory, that directory is said to be ‘above’ the file, closer to the root.
Important
You will now begin to see what are known as “code blocks.” This is indicates it is text from a terminal shell or code environment. The different format, often on its own line, makes it easy to find/copy when working from another window:
code block exampleDon’t worry about the various colors for now, we’ll talk about that later.
Caution
When copying from a code block, it MUST BE EXACT. Typos in commands and configurations will almost certainly cause the majority of your problems.
All directories/files stem from the root, which we symbolize with the / symbol. If your root (/) contains a directory called home, then that would be located at /home. If /home contains a directory called user, then that location would be /home/user (the / symbol also separates directories, and we pronounce it “slash”). Let’s jump into a terminal and get familiar.
We’re going to get started in a terminal. There are many reasons for this, namely, you will at some point need to drop in here as a Linux user. If you find it painful, good, embrace it. Not everyone will become a command wizard, and that’s fine, you just need to know the basics. We will mix in graphical actions shortly.
Basic Navigation
Tip
There are usually many ways to do something on a computer. Learn a few and use the methods you prefer.
Let’s plug in. On your Linux machine, open a Terminal. This is commonly mapped to the keyboard shortcut: ctl+alt+t (meaning you hold down the ctl and alt keys and then tap the letter t). It can also be found in your applications drawer, main menu, or system tray. Try out the following commands (all executed by using the Enter or Return keys) to learn shell navigation.
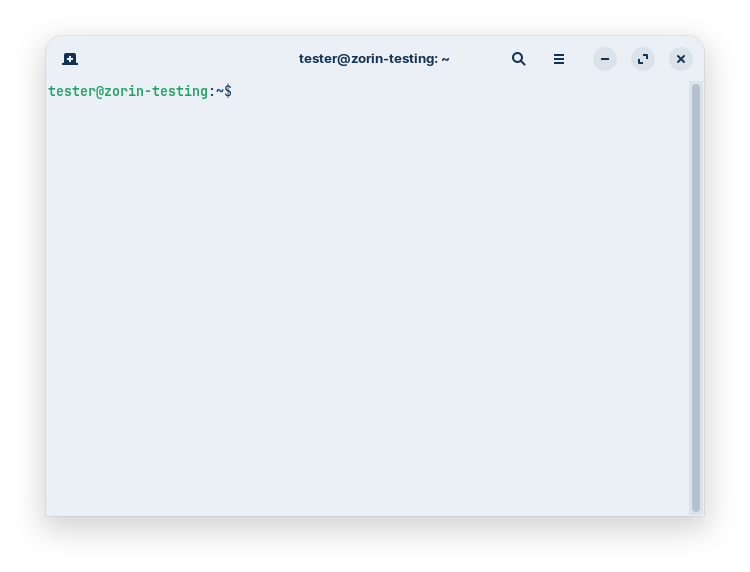
You will see what is known as the “prompt,” followed by a flashing cursor. Sometimes it is simply a $ or #, and other times it may be used to identify some information. In our example below, it lists the user@host (tester@zorin-testing). The host is simply the name of this computer (used to identify it on a network).
-
pwd- ‘present working directory’ - this will tell you where you are, likely
/home/USERNAME
Tip
When you see a codeblock containing all caps, like
USERNAMEabove, it often means that your machine will show something unique, in this case, the name of your user. - ‘present working directory’ - this will tell you where you are, likely
-
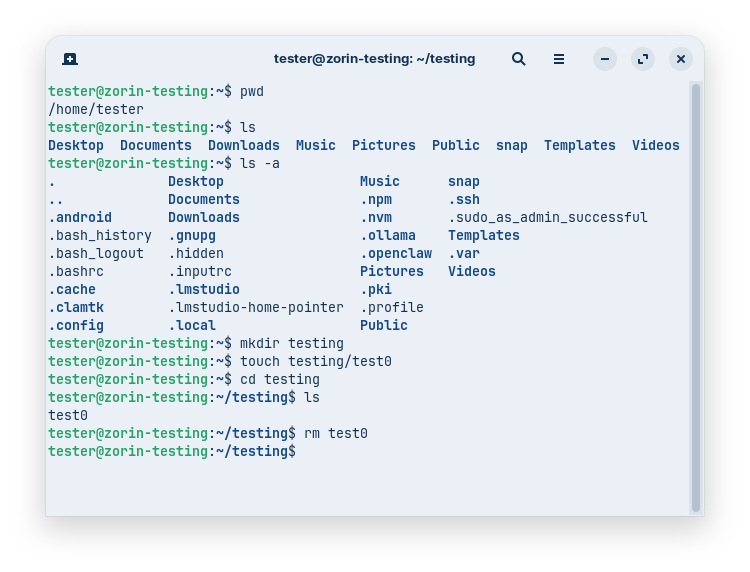
ls- ‘list’ - this will list the contents of the directory you are currently in. If nothing is returned, the folder is empty.
-
ls -a- ‘list all’ - here we have passed an ‘option’ to our command. The
-aoption will list ‘hidden’ files, which are indicated with a.in front, such as.bashrc. If dictated, we pronouce the-as a “tack.”
- ‘list all’ - here we have passed an ‘option’ to our command. The
-
mkdir testing- ‘make directory’ - creates a folder called
testing(you can verify its existence withls)
- ‘make directory’ - creates a folder called
-
touch testing/test0- ‘create file’ - creates a file called
test0- note that it is in thetestingdirectory. Usels testing/to view the contents.
- ‘create file’ - creates a file called
-
cd testing- ‘change dir’ - moves into the
testingdirectory, equivalent to ‘opening’ a folder in the GUI. Your prompt may change to reflect the new location, if it doesn’t, you can verify withpwdor check contents withls.
- ‘change dir’ - moves into the
-
rm test0- ‘remove’ - deletes the
test0file. This is permanent.
- ‘remove’ - deletes the
After all this, your terminal may look something like this demo:
Great, now let’s take a look in a graphical file explorer to visualize all this.
Note
Directory and folder are interchangeable terms.
-
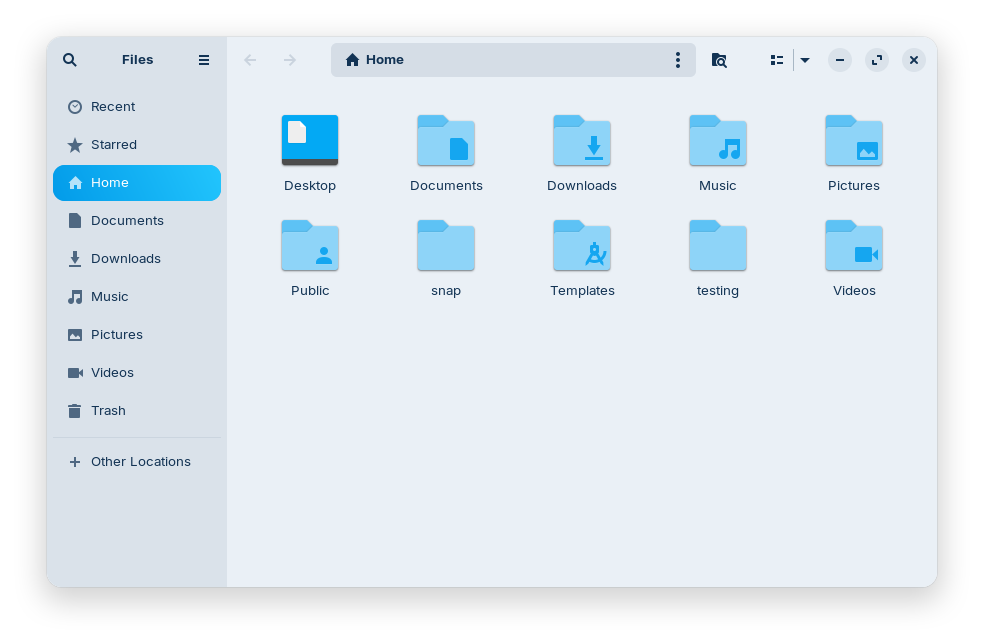
Open up your file explorer. For this demo, we are using Zorin (Gnome DE), and the explorer is simply called “Files.” On your machine, it could be different. For example, the KDE explorer is called “Dolphin.”
- Usually this will open your user’s
homefolder by default
- Usually this will open your user’s
-
You’ll notice the
testingfolder we created is here, click into it. -
We deleted our test file, so the folder is emtpy. Right-click and create a new file of any kind called
test1(right-click the file to rename). The file will appear in the terminal when youls testingor simplylsif you’re already in that directory.
File Manipulations
Let’s learn some more useful commands.
-
Go back to your terminal (or open a new one), and navigate to the
testingdirectory, if you aren’t there already.cd ~/testingTip
The tilde (
~), which we call the ‘twiddle,’ is a shortcut for the current user’s home directory (/home/YOURUSER). -
Let’s attempt something that is not possible - to move a file that doesn’t exist:
mv test9 ..-
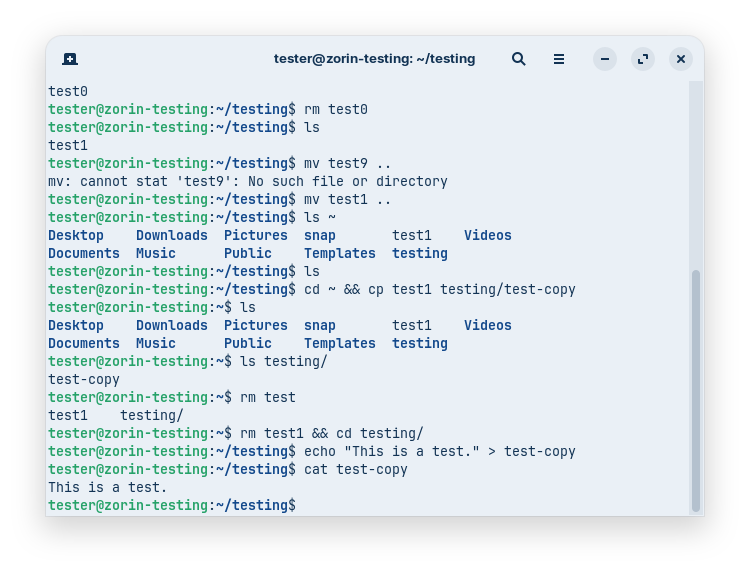
mvis the ‘move’ command, and here we are moving thetest9file (which doesn’t exist) to the directory ‘above’ (indicated by the..shortcut) the one we are currently in. Unless you happen to have a file by that name in this directory, you will get an error something like this (circled in red):
- Presuming you created the
-
cd ~ && cp test1 testing/test-copy- Here we are chaining two individual commands. First we change our working directory to
~(/home/YOURUSER), ‘and then’ (&&- the logical AND - it will execute the second command only if the first succeeds) we ‘copy’ (cp) thetest1file into thetesting/directory, with the nametest-copy.
Note
You may have noticed that commands are generally separated by spaces. This is known as a ‘delimiter,’ and acts as a border. Think of this as ‘something ends/begins’ with a delimeter. You will see more styles of delimiters (tabs, punctuation, etc) in the future.
- Here we are chaining two individual commands. First we change our working directory to
-
rm test1 && cd testing- Delete the original file and then change directories into
testing.
- Delete the original file and then change directories into
-
echo "This is a test." > test-copy- ‘print’ (
echo) everything within the double quotes ("") and ‘redirect’ (>- overwrite) it to the filetest-copy. The redirect will overwrite the entire file, so use with caution. If you want to append (write to the end of) a file, use the>>operator.
- ‘print’ (
-
cat test-copy- ‘concatenate’ (
cat) thetest-copyfile. The name means that we can join multiple files and display them, but this is also a nice quick tool to display the contents of a single file. At this point your session might look something like this:
- ‘concatenate’ (
Great work for making it this far! You now know how to navigate a shell session in a terminal and do some basic file manipulations.
At this point, it may seem to you that this was a lot of work for not a lot of result. Perhaps like an early math class you may wonder - when will I ever use this? The answer is difficult to ellucidate, but know that this will help you throughout your journey. If you intend to continue down the tracks of infrastructure, hacking, or programming - these baby steps will be vital to you going forward, and you will want to master them immediately.